
Before After Banners
The Before After Banners addon for CS-Cart helps you create and display impressive before and after images on the storefront.
The Before After Banners add-on for CS-Cart lets you create and display before-and-after image comparisons on your storefront. Shoppers drag an interactive slider to reveal the transformation between two images, making product improvements and real results easy to see. Admins upload the before and after images, name each banner, set a creation date, and activate it, then customize the banner's width, height, text, and colors. It is intended for CS-Cart store owners who want a visual way to demonstrate product benefits, build trust, and increase engagement on the storefront.

The Before After Banners Add-on for CS-Cart helps you create and display impressive before and after images on the storefront. Customers can easily compare these images using a slider to see product benefits clearly. Admins can upload images, set creation dates, and activate banners to make the storefront more engaging. It’s a simple yet powerful way to highlight product improvements and attract attention visually.
This add-on improves customer experience by showcasing real results and visual transformations. It helps build trust, increase engagement, and promote products more effectively through appealing banner displays.
Feature
- Create Banners: Upload before and after images, set banner name, and creation date.
- CS-Cart Compatibility: Works smoothly with CS-Cart Multi-Vendor.
- Homepage Display: Add banners to the homepage by creating a new block in the Design Layouts section.
- Banner Customization: Adjust banner width, height, and overall appearance.
- Text & Styling Options: Add “before” and “after” text with custom background and font colors.
- Interactive Slider: Customers can easily compare before and after images using a slider.
- Effective Promotion: Showcase products visually to highlight improvements and attract customers.
Installation:-
How to install Addon
https://store.ecarter.co/blogs...
How addon Work
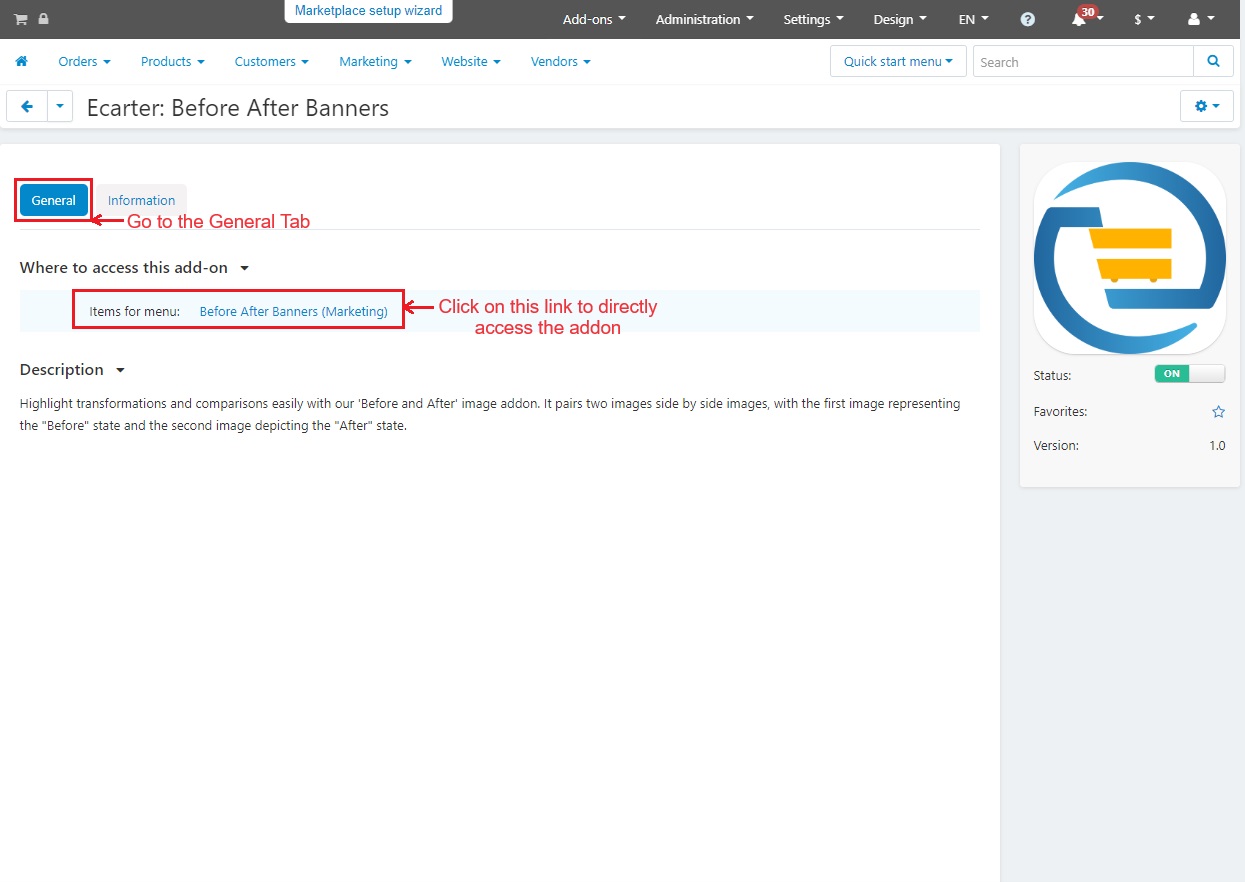
- Go to >> General Tab
- Click on >> Items for menu link to directly access the addon.
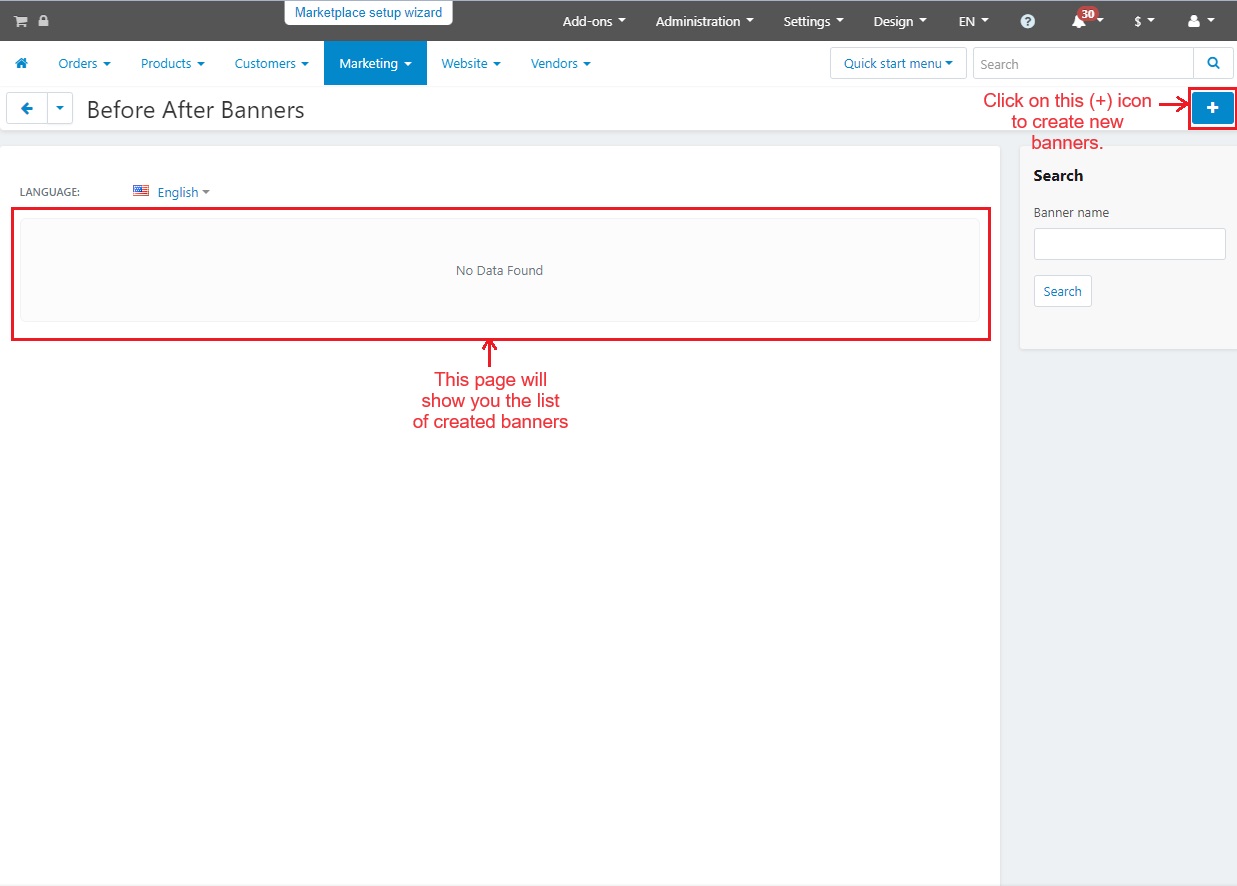
- Below page will show you the list of created banners.
- Click on >> (+) icon to create new banners.
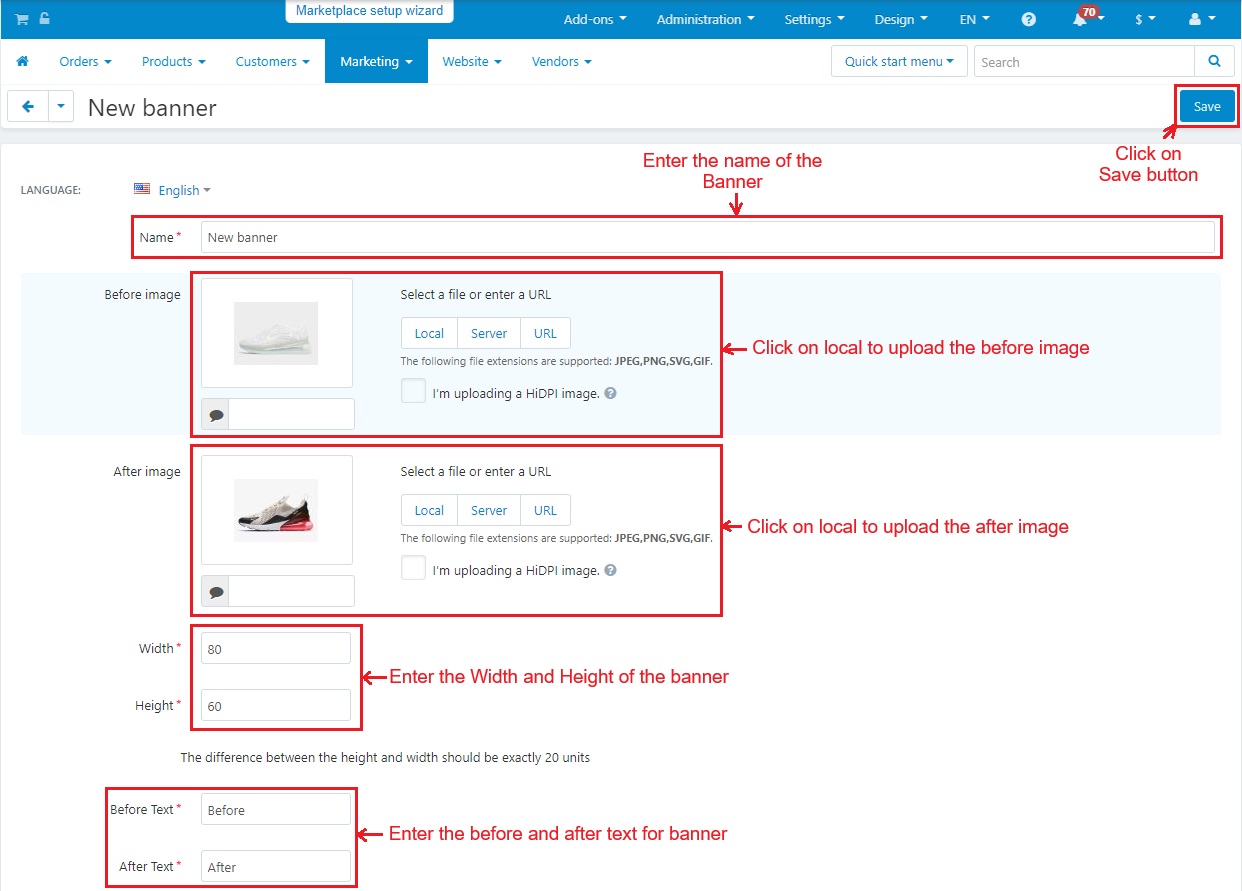
Banner creation settings explanation
- Name: Enter the name of the banner
- Before image: Click on local to upload before image.
- After image: Click on local to upload After image.
- Width and height: Enter the Width and height of the banner.
- Before and after text: Enter before and after banner text.
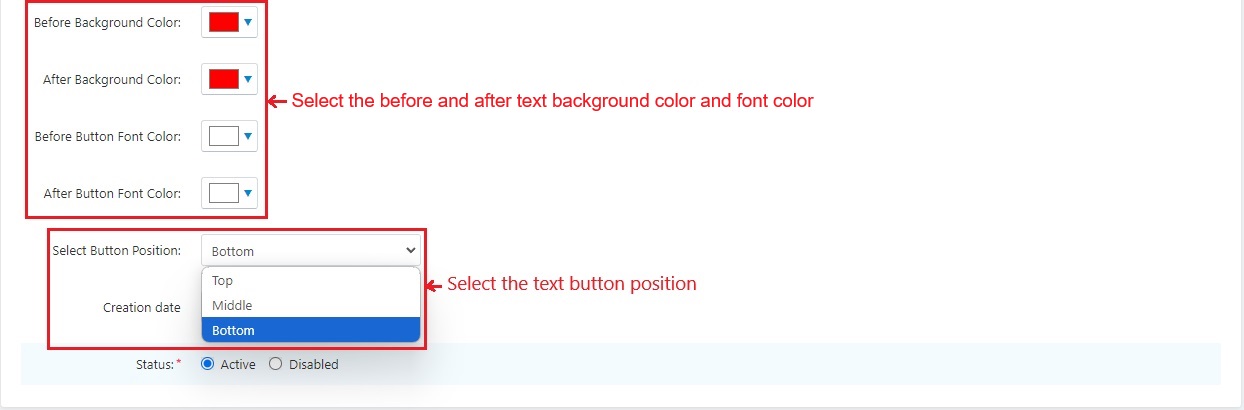
- Background and font color: Select the before and after banner text background and font color.
- Creation date: Here you can select the banner creation date.
- Status: Set the status as Active.
- At the end, click on >> Create button.
- Go to >> Marketing
- Click on >> Before After Banners

- Below you can see the created banner.

Creating the layout of this banner
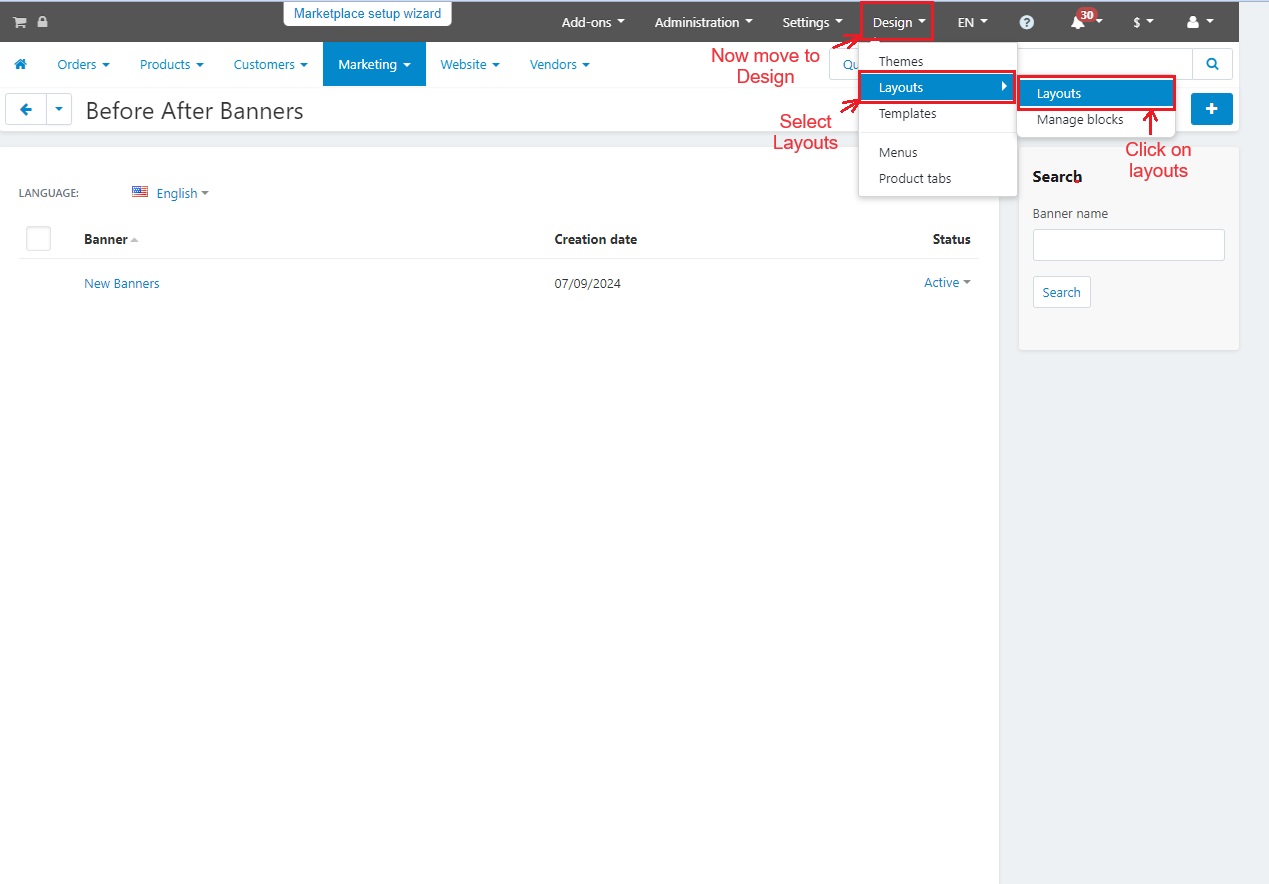
- Go to >> Design menu.
- Select >> Layouts.
- Then, Click on >> Layouts.
- Switch to the >> Homepage
- On the same page, below you find (+) icon. Click on that icon to add a new block.

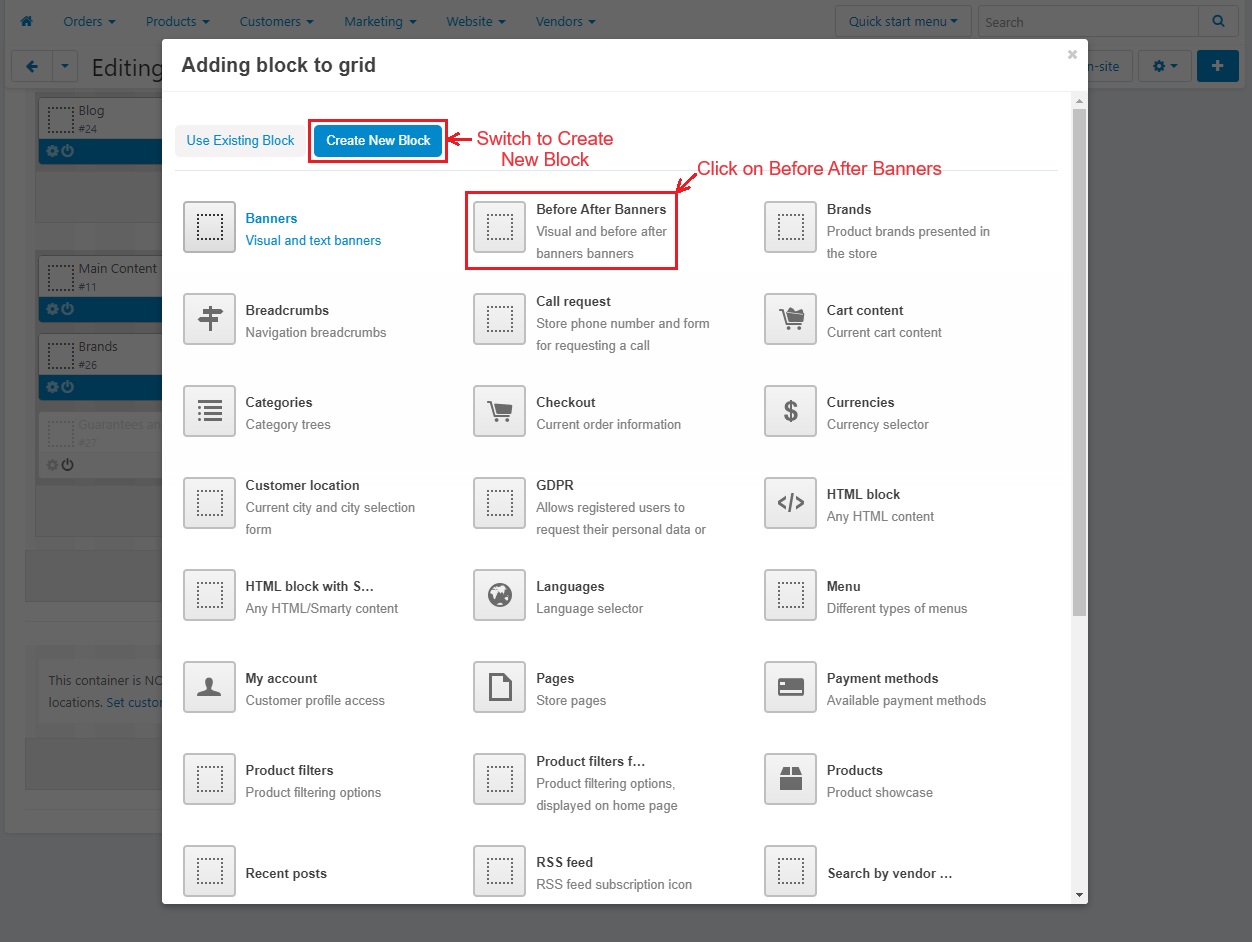
- Now Switch to >> Create New block
- Click on >> Before After Banners
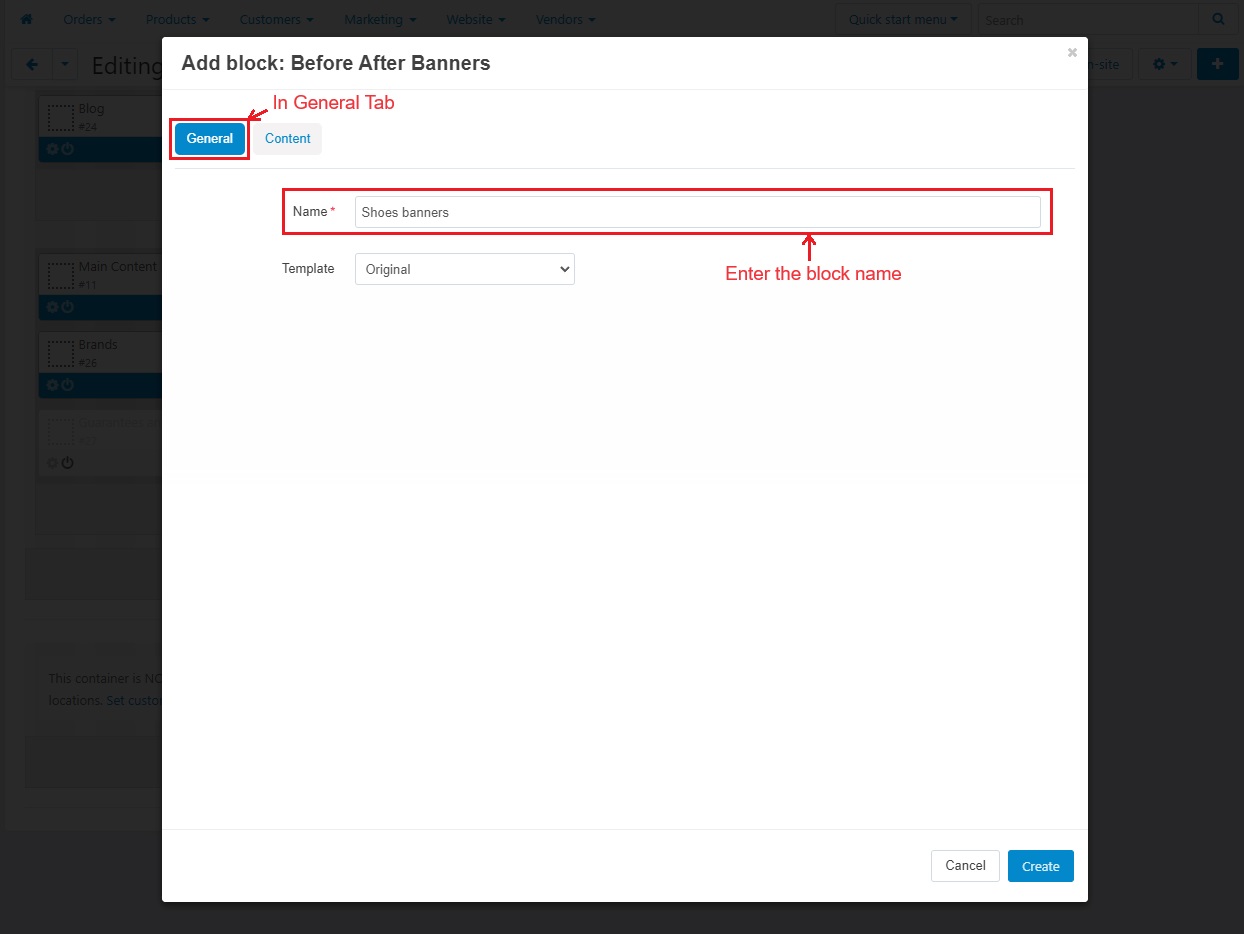
- In the General Tab, Enter the name of the block.
- Switch to >> Content tab.
- Here, you can set the filling.
- Click on >> Add Banners

- Tick the checkbox to select the banner.
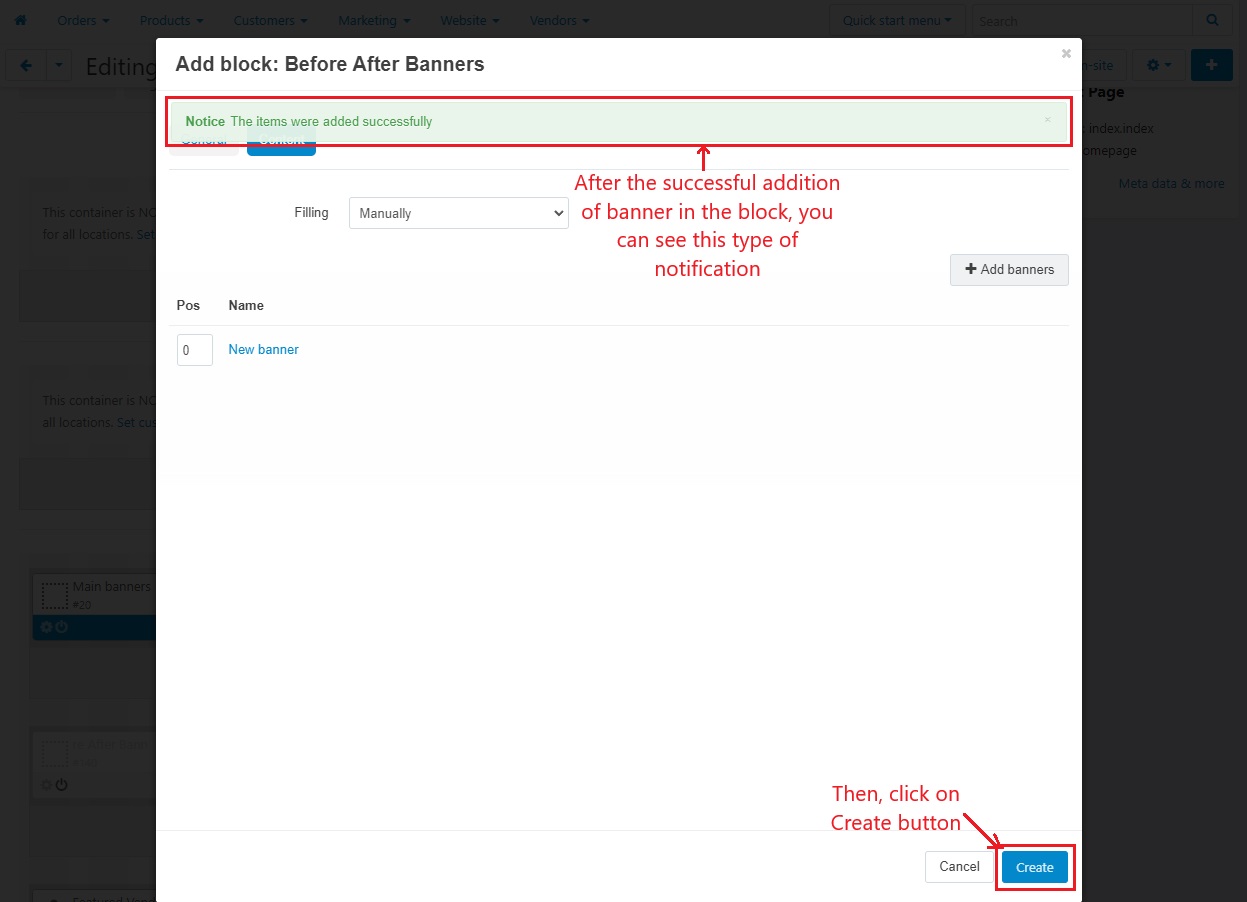
- Then, click on Add banners and close.
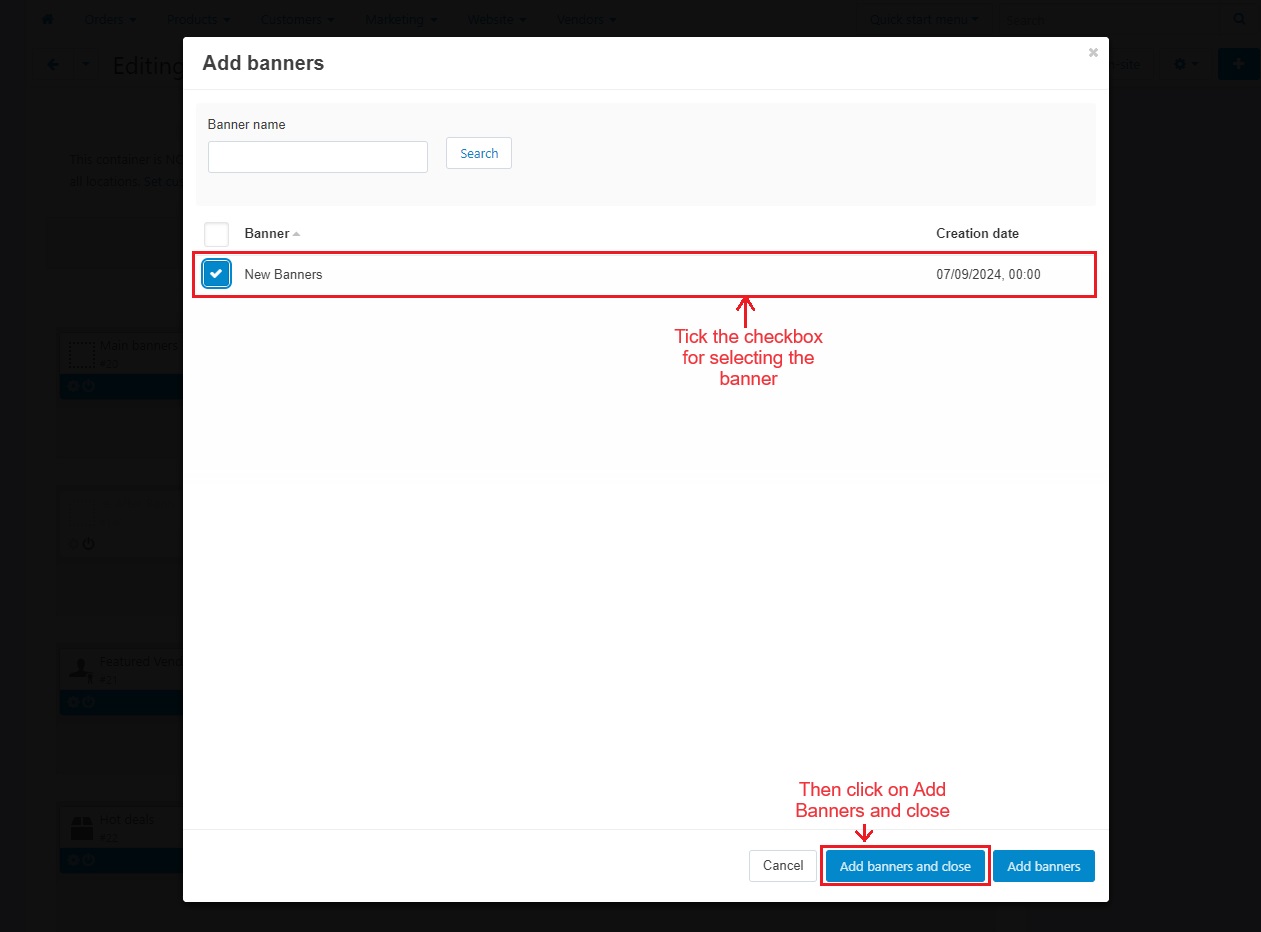
- After the successful addition of the banner in the block, you can see the notification "The Items were added successfully".
- Now, click on >> Create button.
- Below the homepage of layouts shows the new block that we have created.

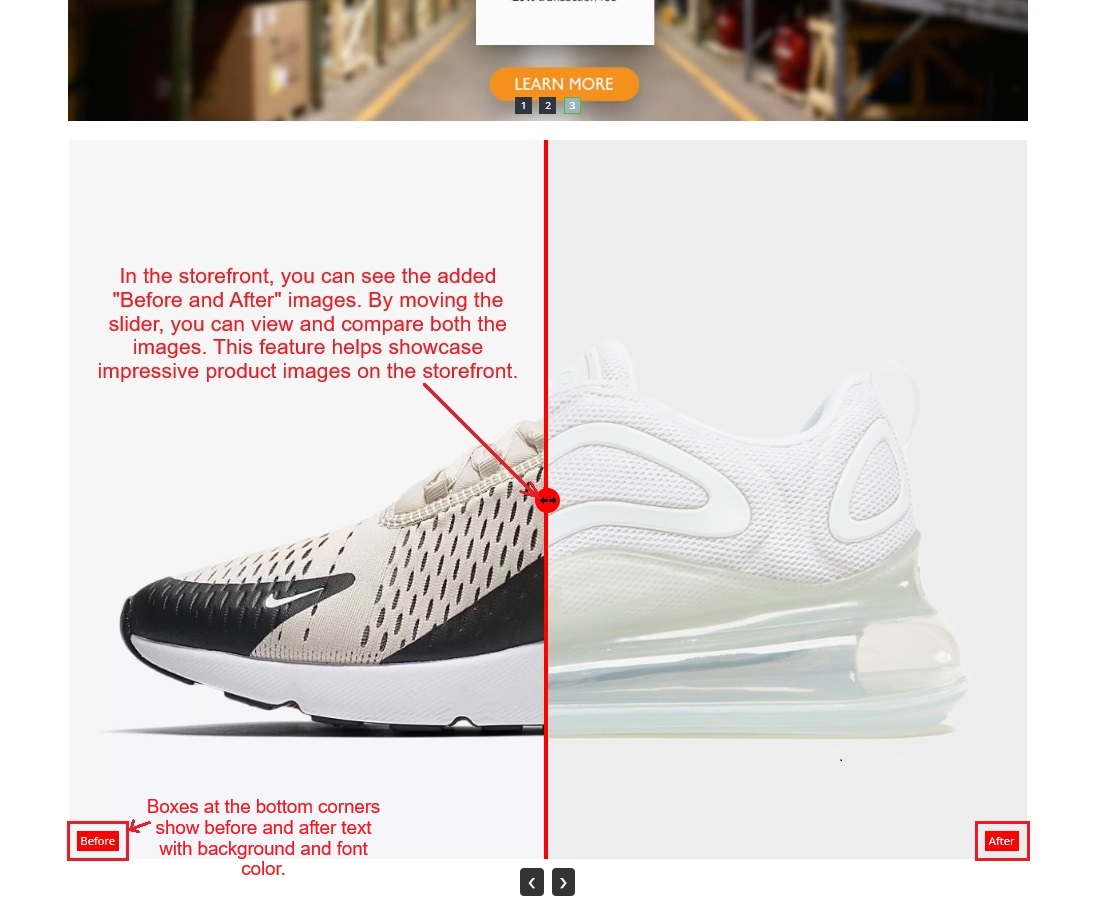
- In the storefront, you can see the added "Before and After" images. By moving the slider, you can view and compare both the images. This feature helps showcase impressive product images on the storefront.
- At the bottom corners, the boxes show the text before and after with different backgrounds and font colors.
Addon-Version:
Version-1.0
Supported Versions:
CS-Cart, CS-Cart Multivendor 4.8.x, 4.9.x,4.10x,4.11x,4.12,4.13x, 4.14x, 4.15x, 4.16x, 4.17x, 4.18x
Support:
This app is developed and published by Ecarter Technologies Pvt. Ltd., a CS-Cart developer. You are guaranteed quality add-ons.
Frequently asked questions
How does the before-and-after slider work for customers?
Each banner shows a before image and an after image with an interactive slider. Customers drag the slider to compare the two images and see the difference clearly.
What can admins set when creating a banner?
Admins upload the before and after images, set a banner name, and set a creation date. You can also add "before" and "after" text with custom background and font colors, and adjust the banner's width, height, and overall appearance.
Does the add-on work with CS-Cart Multi-Vendor?
Yes. The add-on works with CS-Cart Multi-Vendor. If you need confirmation for your specific CS-Cart version, share it and we will confirm compatibility.
How do I display a banner on the homepage?
You add banners to the homepage by creating a new block in the Design Layouts section of CS-Cart. Installation and setup instructions are provided in the add-on documentation.
Kajal is a Technical Content Writer at Ecarter Technologies. She writes technical documentation and in-depth guides on eCommerce platforms, mobile commerce and AI in online retail.